Chapter 6
Retouching Your Photos

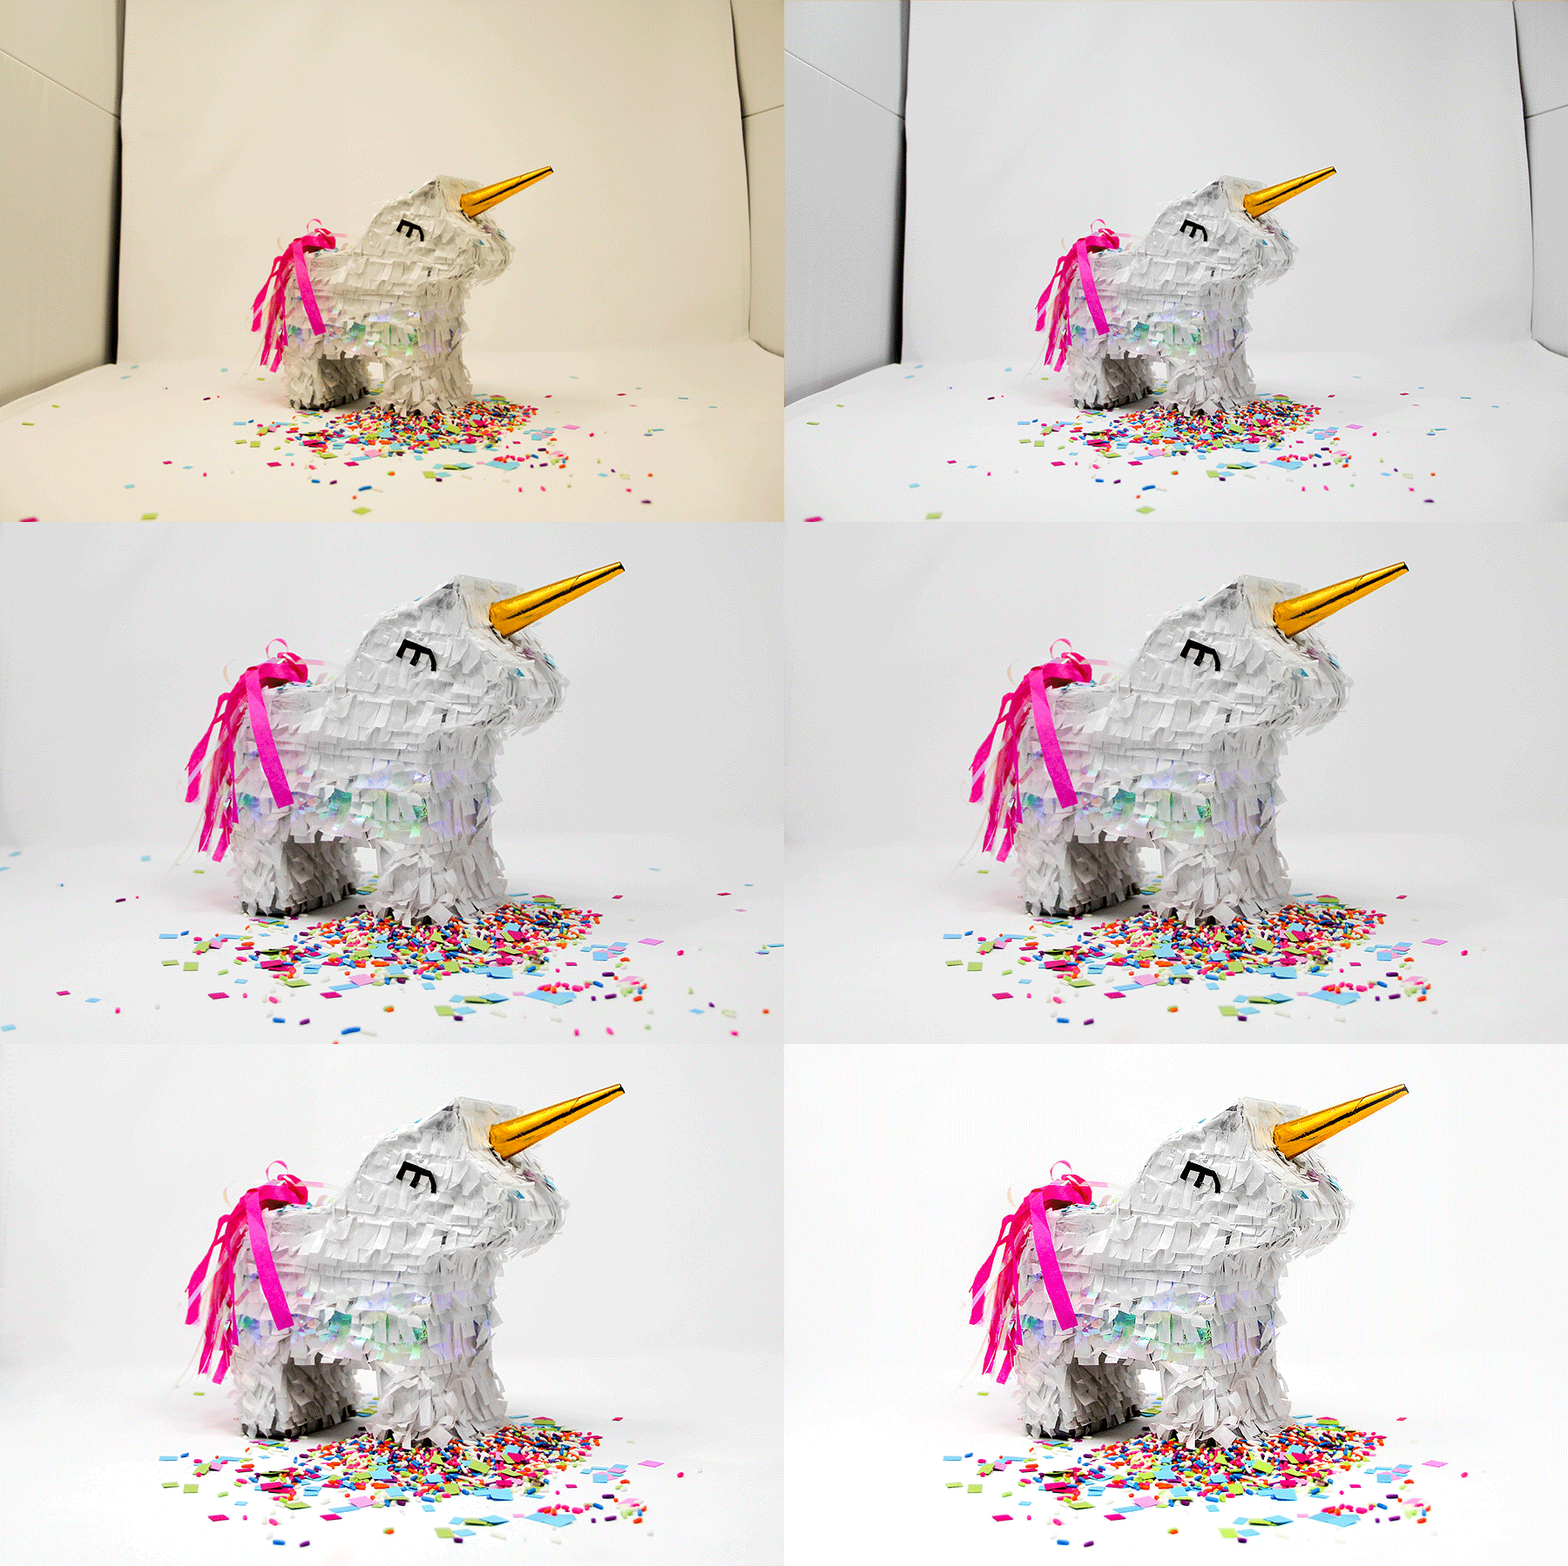
Here are a few basic tips that we found helpful for retouching product photos. This is by no means comprehensive. You could spend days of your life learning the intricacies of Photoshop and we think there are much better resources to do that than this post. (We think the courses on Lynda as a great place to start.)
As always, the goal is to do just enough to make your photos sell your product within the right amount of time you’re able to spend on the process.
The things we found work best across all photo editing platforms:
• Make sure to crop your photo to position your product properly — sometimes it’s difficult to shoot your photos so that they’re in the very center of the frame. This is easy to fix — just crop the sides of your photos so that the image is centered. An uncentered product image can make your site look unprofessional.
• Adjust image levels to make corrections to your image exposure — If you didn’t shoot the perfect product photo, it can be helpful to adjust the levels to make your exposure better. Each program is different, but you can usually use the help bar to find out how to adjust levels within the program. The goal here is to make your product look realistic, not to add a romantic or stylized filter. People want to see what your product looks like in the best case scenario — not a stylized or aspirational version of it.
• Use the Clone tool to get rid of spots and dust marks. The clone tool allows you to take one part of an image’s background and then stamp it on another. If you’re shooting on white, this is a great way to remove any blemishes that might have shown up when shooting the background.