Chapter 2
Installing Analytics and Creating Filters

As a website owner, you've probably heard of Google Analytics. Whether you have or haven't installed it, or you're just not sure what's next, this guide will help.
Getting started with Google Analytics means installing the code on your website and making sure it's functioning correctly. If you've already set up and tested your code, feel free to skip this section.
How to Install Google Analytics
Your first step will be creating a Google Analytics account for your business. You might already have a Google account through Drive or Gmail; you can use that account. If you don't have an existing account, or you want a separate one for business, you can create one here.
Whether you will be managing your analytics account solo, employing in-house team members or going through a marketing agency, retaining control over your main account is critical.
Setting Up Your Account
Once you have your Google account set up, you'll go through the following steps to create your Analytics account.
First, navigate to Google Analytics and click the Sign Up button to fill out your site information.

If you have multiple sites or subdomains, you'll want to decide how you're structuring your account. You can have up to 100 accounts, up to 50 properties per account and up to 25 views per property.
You can restructure your properties and views down the line, but you can't migrate properties to different accounts. If you need to do this, you'll need to create a new property and start from scratch—just remember you'll lose the data you've collected!
Install the Tracking Code
Once you set up your website account, you'll get your tracking ID and code. You'll need to install the code on every page of your website per the instructions. How you do this will differ based on your platform. For some, you can edit the header and footer directly, or use a plugin. With other platforms, you'll need to access the HTML to add the tracking code before the </head> tag on all pages. This part of set-up can be confusing, so Weebly make it easy to add the Google Analytics code in the Header or Footer section.
Each website builder is different, so check how to correctly install the code on your platform's help section or with a quick Google search.
How to Set Up Analytics on your Weebly Site
With a Weebly site, setting up Analytics is simple and quick. Once you have the Google-provided code, log into your Weebly site and click Edit.
Under the Settings > SEO tab, you can paste this code in either the Header or Footer section:
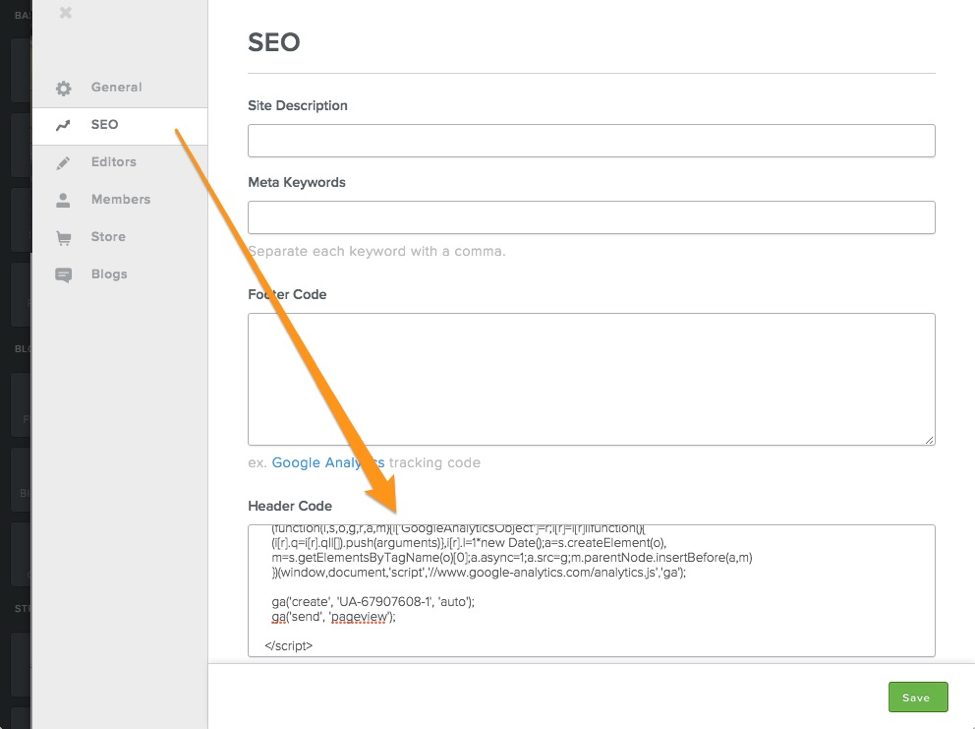
Then click Save and Publish!
Setting up Filters in Views
You're definitely taking a step forward with your business by installing Google Analytics, but to get the cleanest and most accurate data, you'll need to install filters.
Filters can be used to include only specific subsets of traffic, exclude unwanted data or to search and replace certain pieces of information. They can be created at the Account level or View level.
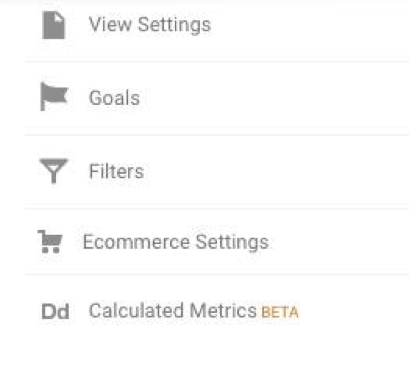
To create a filter, navigate to your Admin screen. In this example, you'll only have one account and one property for one domain, so you'll be creating a filter at the View level.
Start by clicking on Filters under your selected View:
Setting up your filters will depend on your business, but there are a few filters every account should have:
-
Unfiltered View: This will help keep your Raw Data available and historical. Don't add any filters at this View level.
-
Test View: This is a helpful view for testing both conversions and other filters. Before you apply filters to other views, test them here for a few days to make sure they are doing the correct job. You can also use this as your goal-testing view by excluding your personal IP address.
-
Main View: This will be your main view for data. It should have the everyday filters you need for clean data (after testing them in the Test View) and should be your benchmark for reporting.
It's important to note that filters are not retroactive; any filter you apply will affect your data moving forward. That's why it's important to set up these three views at the very beginning of setting up your account.
Filters to Create
There are a few standard filters every website should include:
1. Exclude IP Address: You're probably on your own website more than you realize, and that traffic should be filtered out for the most accurate data. Find your IP (you can just type "what's my IP" into Google) and set up your filter the following way:
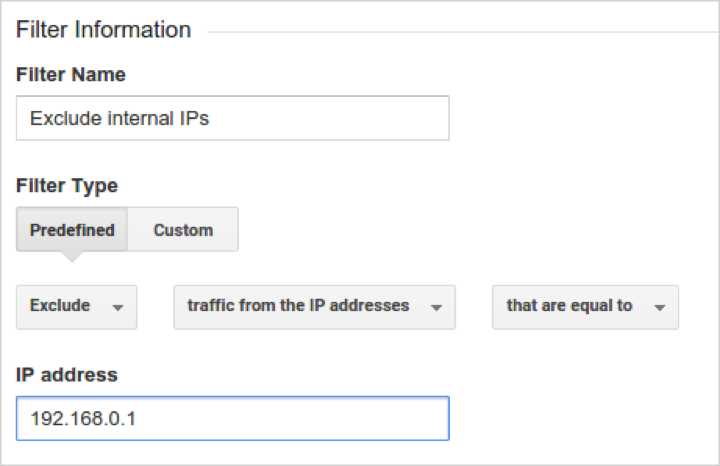
It's important to remember to do this for all business locations—and your home as well!
2. Include Specific Hostname: This filter will eliminate as much spam sending fake traffic to your Analytics account as possible by only including traffic from people visiting your site.
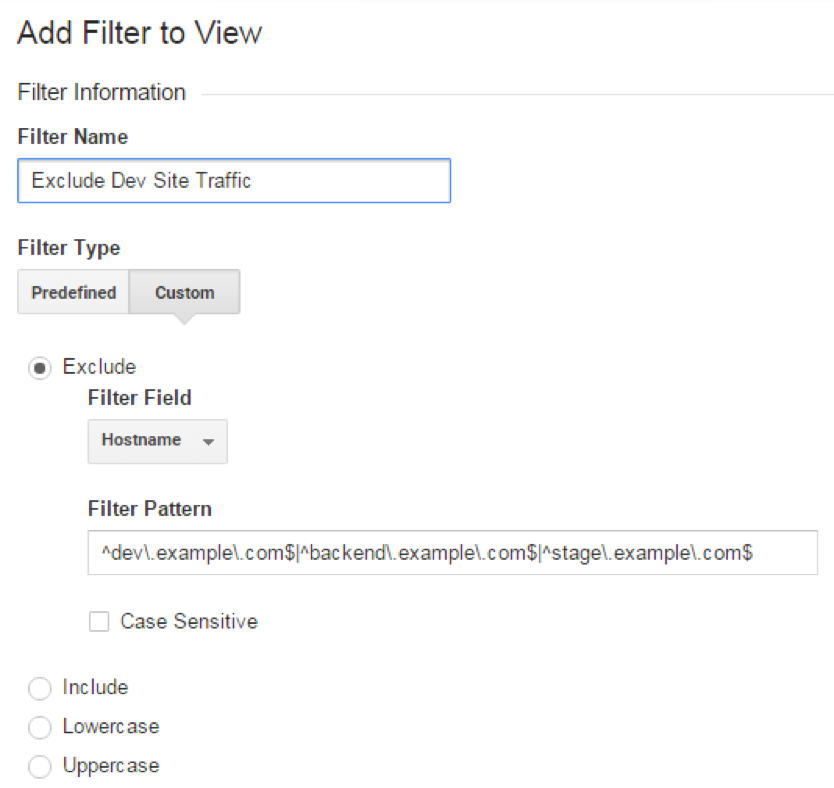
3. Exclude Dev Site Traffic: If you have testing pages or development subdomains, you'll want to exclude traffic to those pages from your main view.
These are only a few examples of filters that can be added to your Analytics account. This will give you the best data for reporting and tracking conversions, which you can find out how to do in our next chapter.