Chapter 12
eCommerce Tracking
If you have an eCommerce site, adding tracking to Google Analytics is the best way to analyze shopper behavior and conversion optimization. With eCommerce tracking, you can measure the sales and revenue of your site.
To enable eCommerce data in Analytics:
-
Enable eCommerce for each view in which you want to see data.

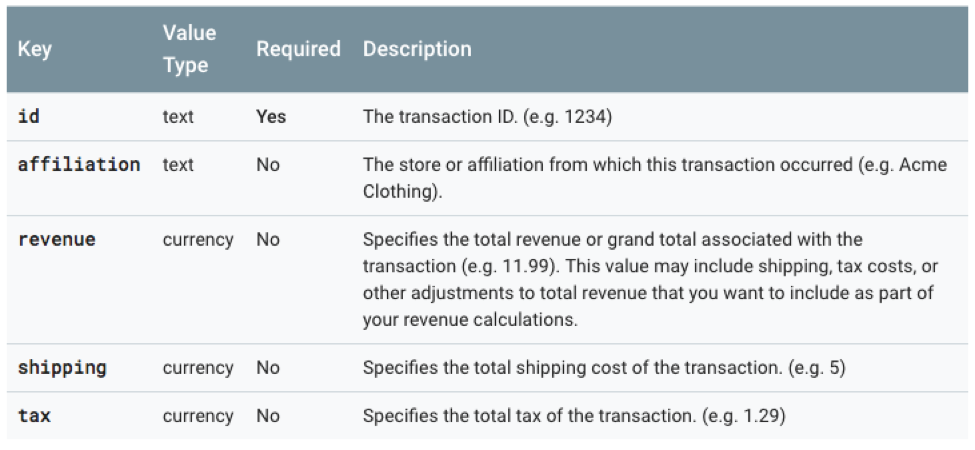
There are two kinds of eCommerce data you can send using tracking code: transaction and item data. A transaction corresponds to the entire transaction that takes place, and includes the following values:

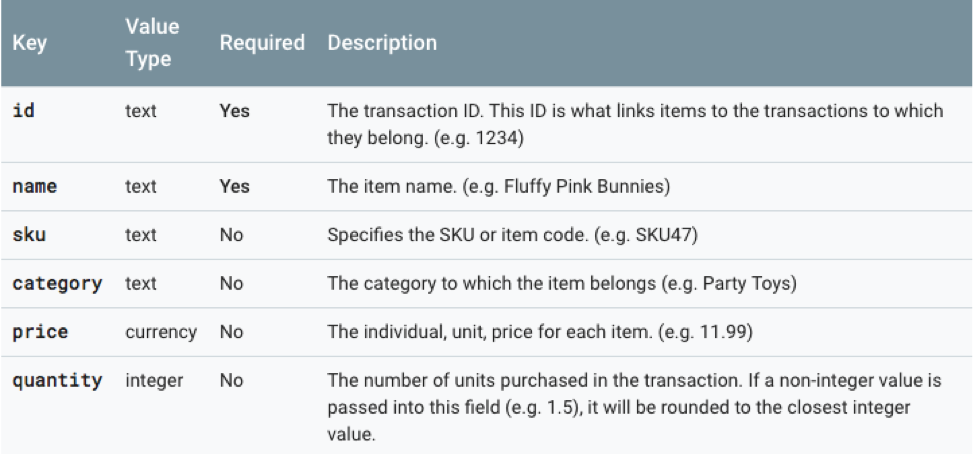
An item equals the individual products that were in the user's shopping cart, and includes the following values:

Enable E-commerce for a View
- Sign in to Google Analytics.
- Navigate to your selected view in the Admin panel and click on E-commerce Settings.
- Set Enable E-commerce to on.
- Click Next step > Submit.
Tracking Code Setup
To collect eCommerce data from your website, you need to add the JavaScript code that sends the transaction data to your Analytics account.
-
Load the eCommerce plugin using the following command:ga('require', 'ecommerce');Employ this command after you initiate your tracker object and before you apply any of the e-commerce-specific functionality.
-
Once the plugin is loaded, it generates a transparent shopping cart object. You can add transaction and item data to the shopping cart, and send the data completely upon configuration.
You can add transaction data to your cart using the ecommerce:addTransaction command:

- Add items
In order to add items to your cart, you use the ecommerce:addItem command:

- Send Data
Once you've finished adding transactions and items to your shopping cart, you send the data to Analytics using the ecommerce:send command:
ga('ecommerce:send');This command will send the transaction and item data to your Analytics account so you can see all transactions as they go through. With this tracking, you can monitor abandoned carts, your best-selling products, and identify ways to optimize sales.